STEP 1. Create a Free Account
Creating a free Neighbourlytics account is easy.
- First - go to our website and click on the “start free” button in the top right
- Create a login for your account - noting that this email address will be the one that you will receive information about new data releases, as well as platform changes.
And that’s it, you’re straight into the platform to access nationwide data instantly.

STEP 2. Choose your seat type
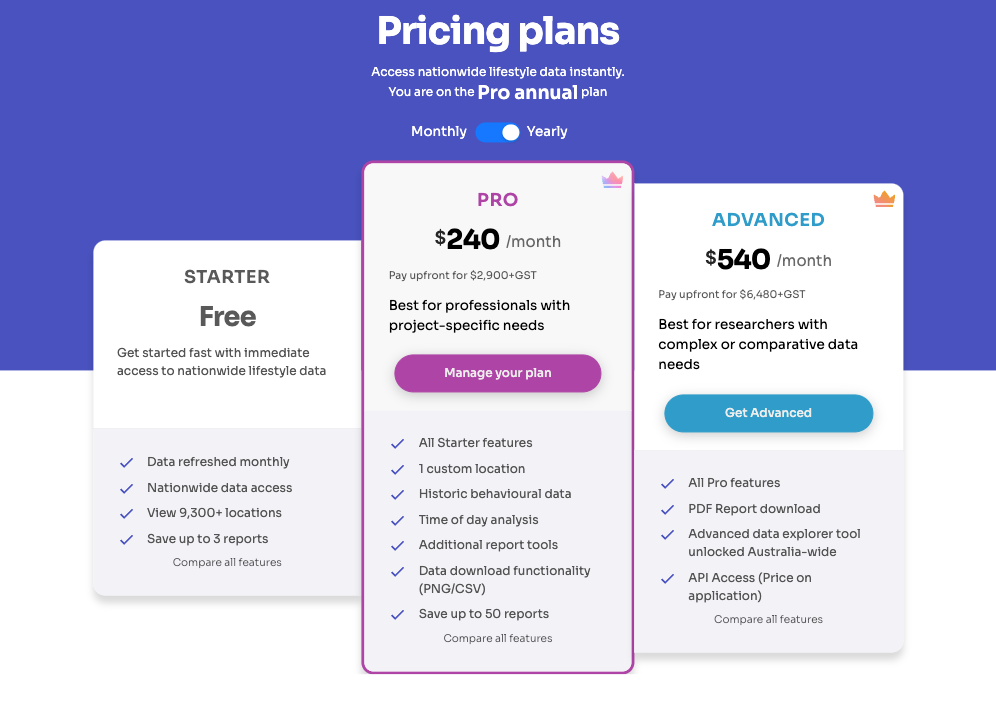
Neighbourlytics offers users the choice of three seat types, to meet your needs. All accounts enjoy monthly data refreshes for 9,300 locations nationwide. Choose which access level suits your needs.
Choosing the right seat type:
Starter is our Free account level. Starter enables you to get started fast with immediate access to nationwide lifestyle data. Typically used by newbies wanting to get comfortable with lifestyle data.
Pro is our entry level access for professional users. Pro seats include historic data, temporal analysis, download functionality and other tools. Typically used by professional place managers to support monthly place tracking.
Advanced is our comprehensive access level. Advanced seats provide deeper functionality for all locations across Australia, most notably by providing nationwide access to our Explore tool.
View a full comparison of features on our Pricing page.

STEP 3. Build a quote (just a seat or include Add-ons)
Whether you want to see what overall spend might look like, or need a quote to get approval from elsewhere, you can build a custom quote directly in our platform.
Build your own quote:
- First, log into your account (or create an account)
- View the Access Management Portal by clicking on “Upgrade” or your Access badge in the top right of your screen.
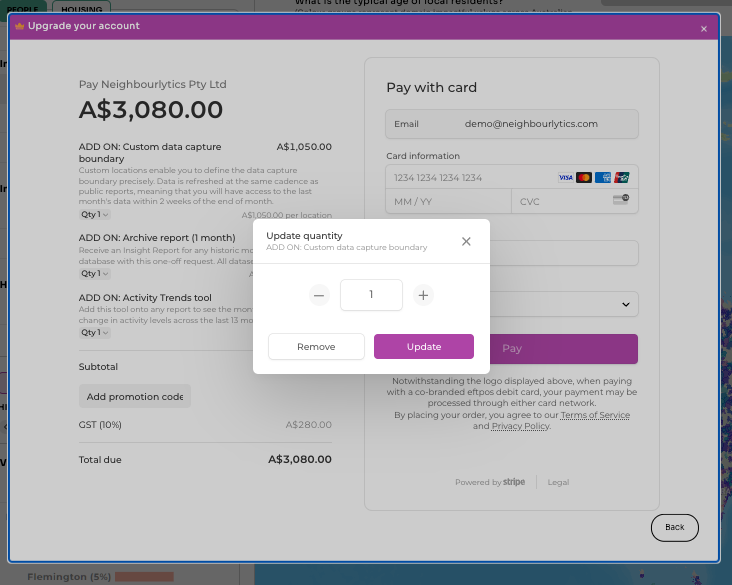
- Select the seat you need, and check “Include Add-ons” if you’d like to calculate one off purchases
- Change the quantities to add or remove what you need.
- Once you’re happy, you can move onto the next step to make payment.
Need a formal quote?
No problem. Generate a quote with the items you need, and share it with us using the "Submit a request" tool in the Help menu. Alternatively email us a screenshot of your quote, and we will provide you with a quotation, complete with our tax and payment information.
STEP 4. Paying for your account
Once you’re ready to go, you can use our in-app Stripe facilities to easily and securely pay within the platform. This will give you instant access to your upgraded seat.
To pay, simply:
- Log into the account you wish to upgrade
- Open the payments page by clicking “upgrade” in the top right of the screen.
- Select the product(s) you wish to proceed with, and input your card details. These details can be changed at any time.
- You will shortly receive a receipt via invoice, and can check your history or change your details directly in your Management Portal.
- Purchasing for a team or unable to make a card payment? No problem, just contact us to arrange an invoice for payment.
STEP 5. Check, change or cancel your subscription
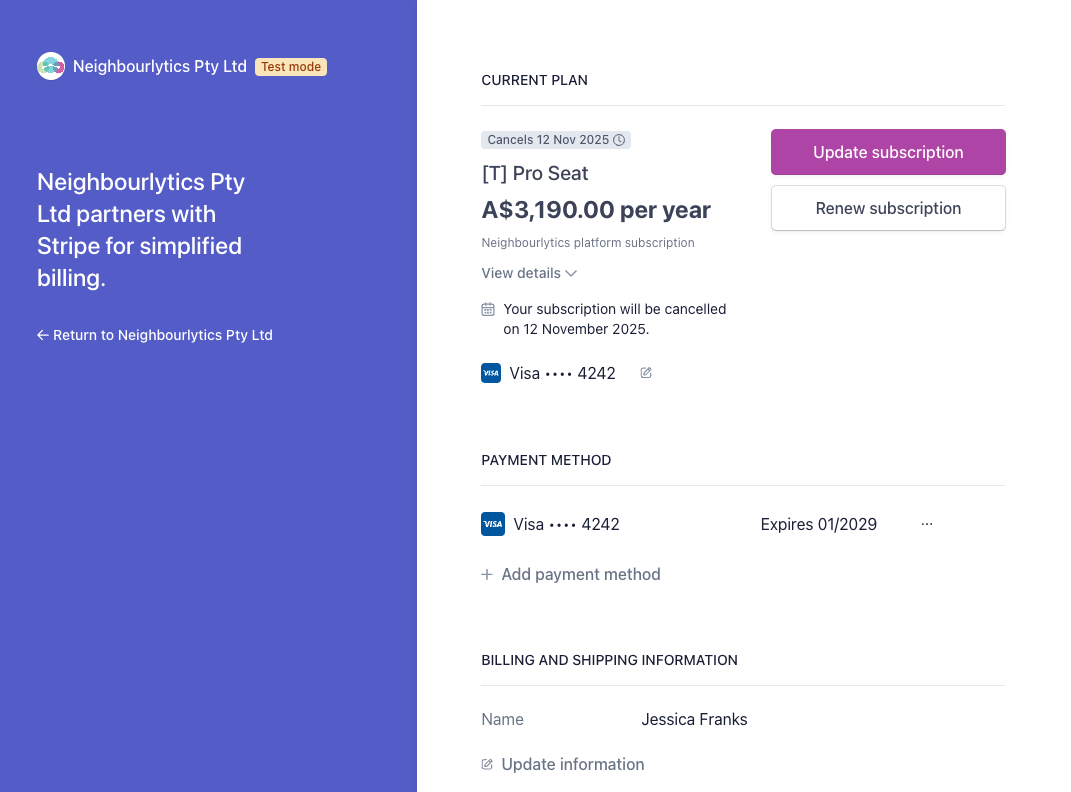
You can easily check the status of your subscription, or change and cancel your subscription directly in the platform. All renewals are handled automatically unless you change your subscription.
To check or change your details:
- Log into the account you wish to view or change
- Open the access management page by clicking on your seat type in the top right (this will say, Starter, Pro or Advanced)
- Select “Management Portal” to open your Stripe billing interface. In this view you can see a complete record of your transactions, including historic billing, and next scheduled payment
(note that if you were a Neighbourlytics customer prior to September 2024 your history may not appear in this window) - You can easily change your access by cancelling your current account, and then selecting the seat you next wish to access.

When do changes take effect?
Downgrade or cancellations will take effect at the end of your current billing period. This means if you are paid annually, you can cancel your renewal now, but retain access to your seat until the end of the billing period.
Upgrades take effect immediately. If you are partway through a billing period and decide to upgrade, you will see prorata credits applied to your upgrade purchase. For example, you are 6 months into an annual Pro seat, and wish to upgrade to Advanced. Your invoice for Advanced will show 6 months worth of credit from your upgraded Pro account.
STEP 6. Unlocking 'Add ons' for your account
You can access more features or further customisation at any time by utilising our account Add Ons on a 'Pay as you go' basis.
Add ons include:
- Custom locations - 1 custom location is included with every paid seat, but you can easily add more at any time. All custom locations refresh monthly along with the 'public' reports.
- Premium data tools - Our Activity Over Time, and Lifestyle Values report sections can be added to any report as an 'Add on' purchase. Premium tools are unlocked for a single month, and can be added at any time.
- Archive Report - Request a full report for a single historic month from our data archive. The report will sit in your library for easy comparisons to contemporary reports.

To request Add Ons for your account:
- Log into your paid account, and open your access management page by clicking on your seat type in the top right (this will say Pro or Advanced)
- Click on 'Buy Add ons' in the top right corner
- A shopping cart will open, showing you all the available Add Ons. Edit the quantities in the shopping cart to your desired volumes.
- When you're happy with your Add Ons, submit payment. Payments for Add Ons are 'one off' only, and not refreshed with your monthly or annual subscription.
- Our team will be in touch within 1 business day to confirm your Add On purchase and unlock the feature for you.
